
How to add invoices to a Project
Your team can add invoices to a Project in one of two ways:
1. Bulk upload via .csv
2. Adding invoices one by one
How to add invoices to a Project:
First, select the Project you'd like to add invoices to. Then follow the steps below depending on your Add Invoice method (bulk upload or individual add).
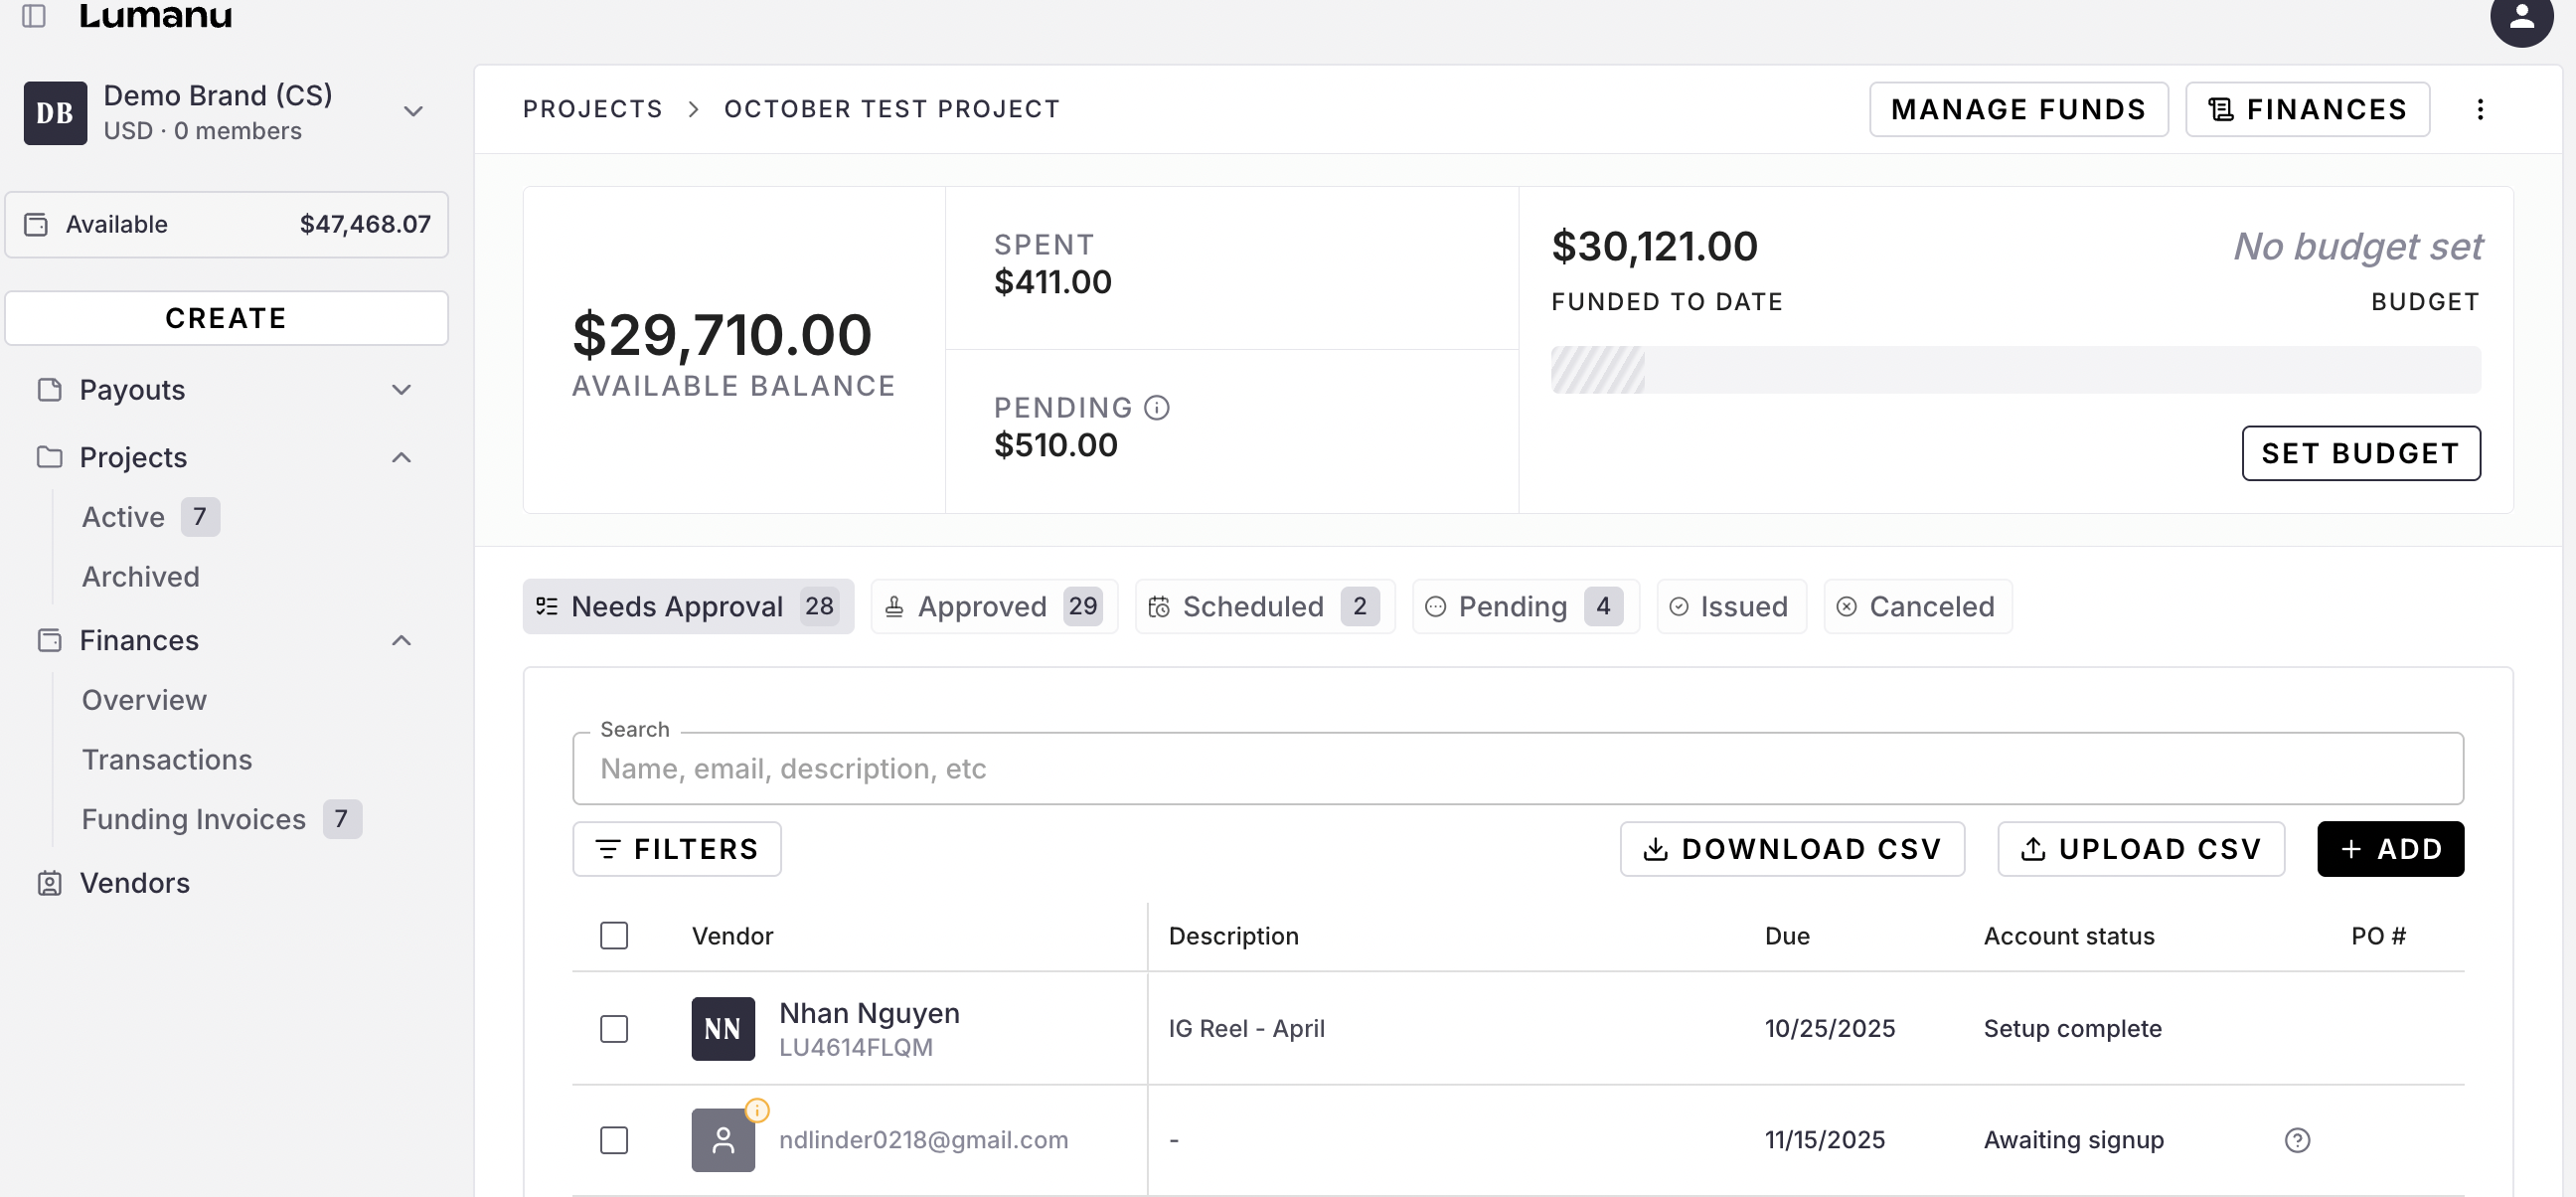
Add individual invoices to a Project
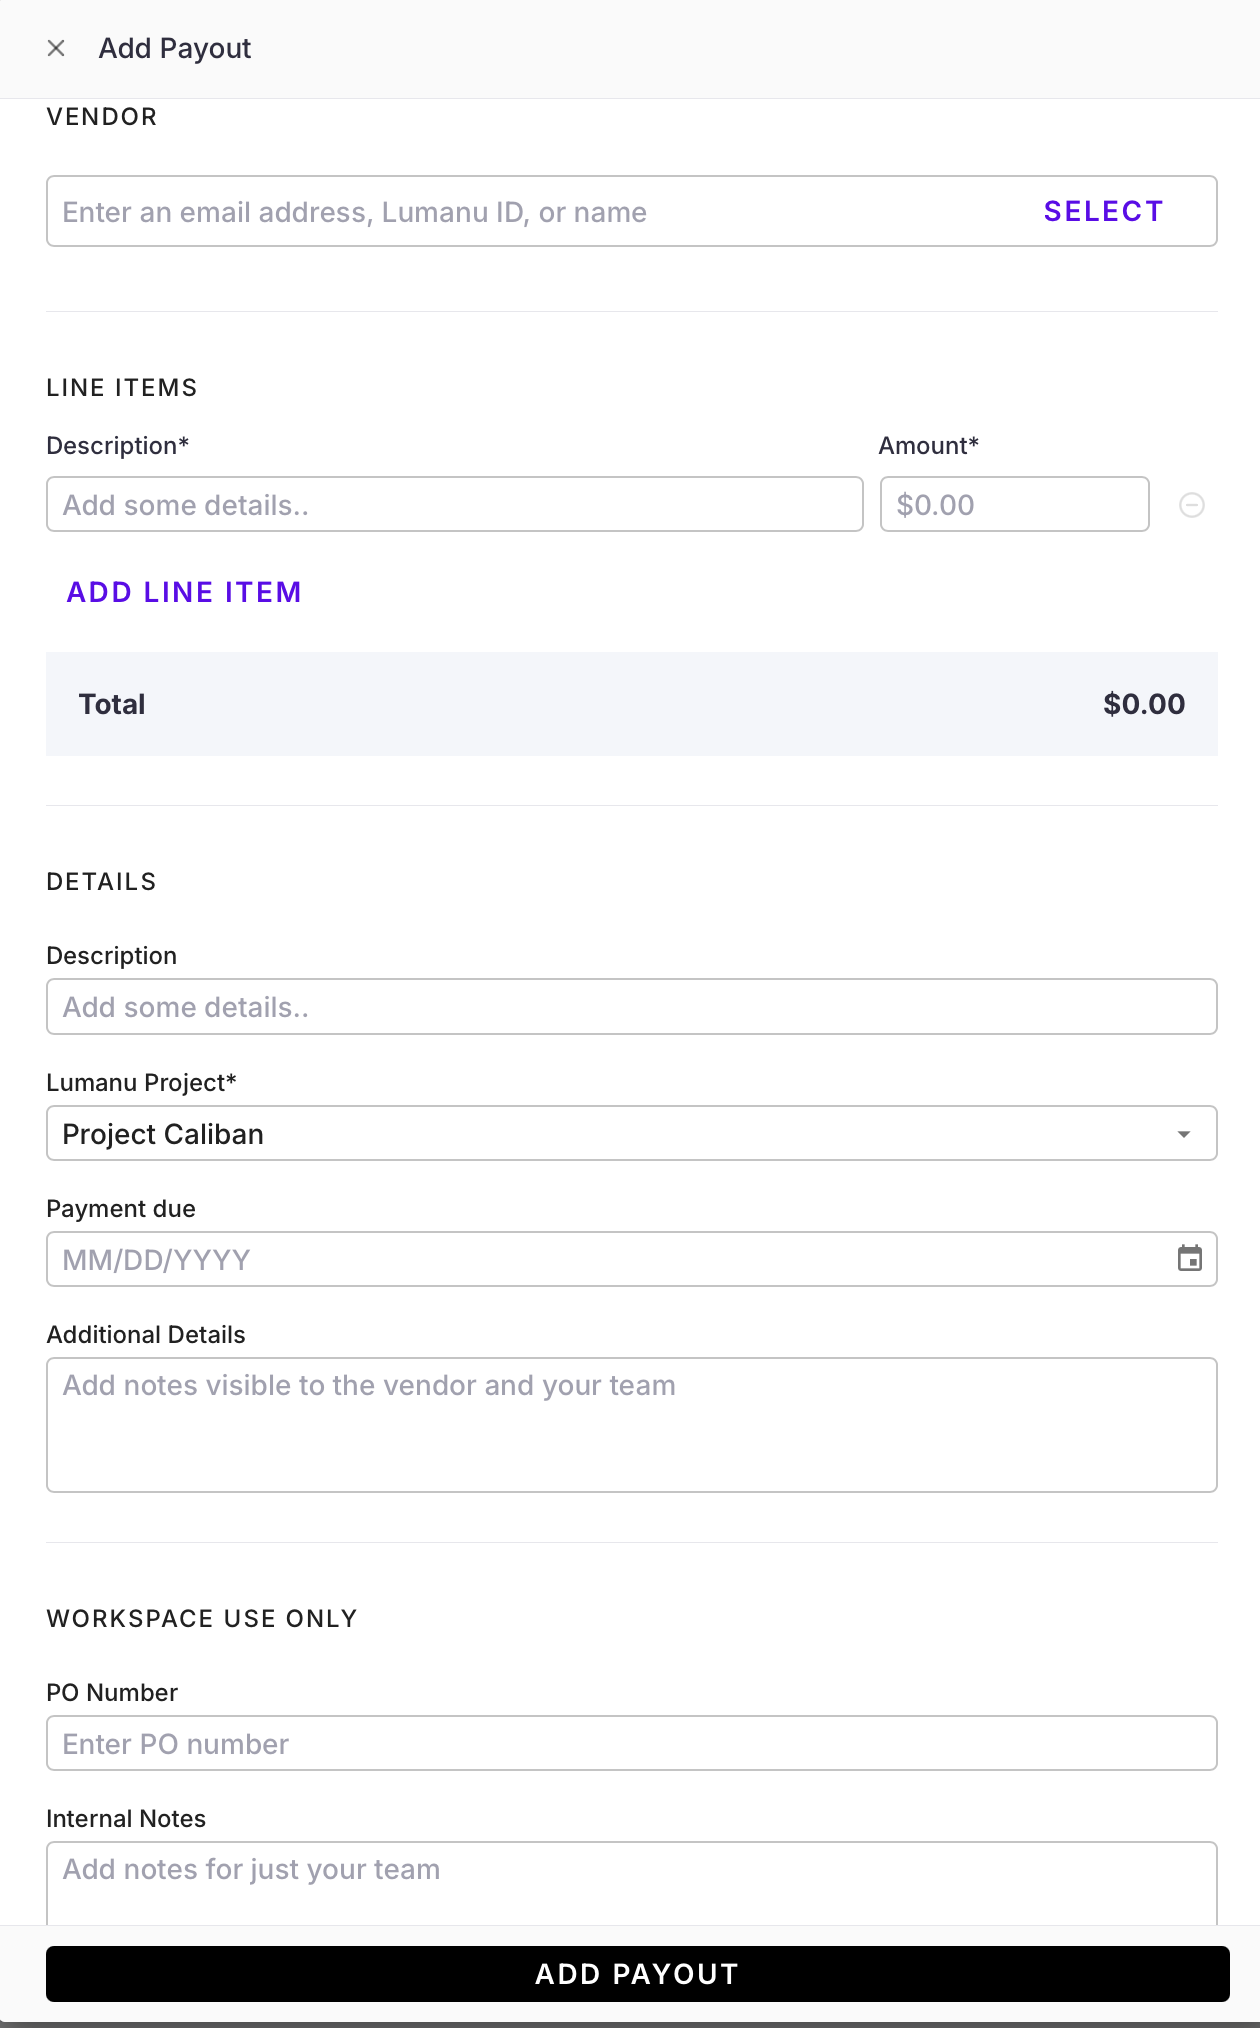
Click the Add button
Search for the invoice recipient from your vendor list or enter the recipient’s email address, name, or Lumanu ID.
📣 If the recipient doesn’t populate when searching, you can create a new contact and they will be sent an invitation to join Lumanu.
Enter the invoice details
Click Add. The new invoice will populate under the Needs approval tab in your Project.

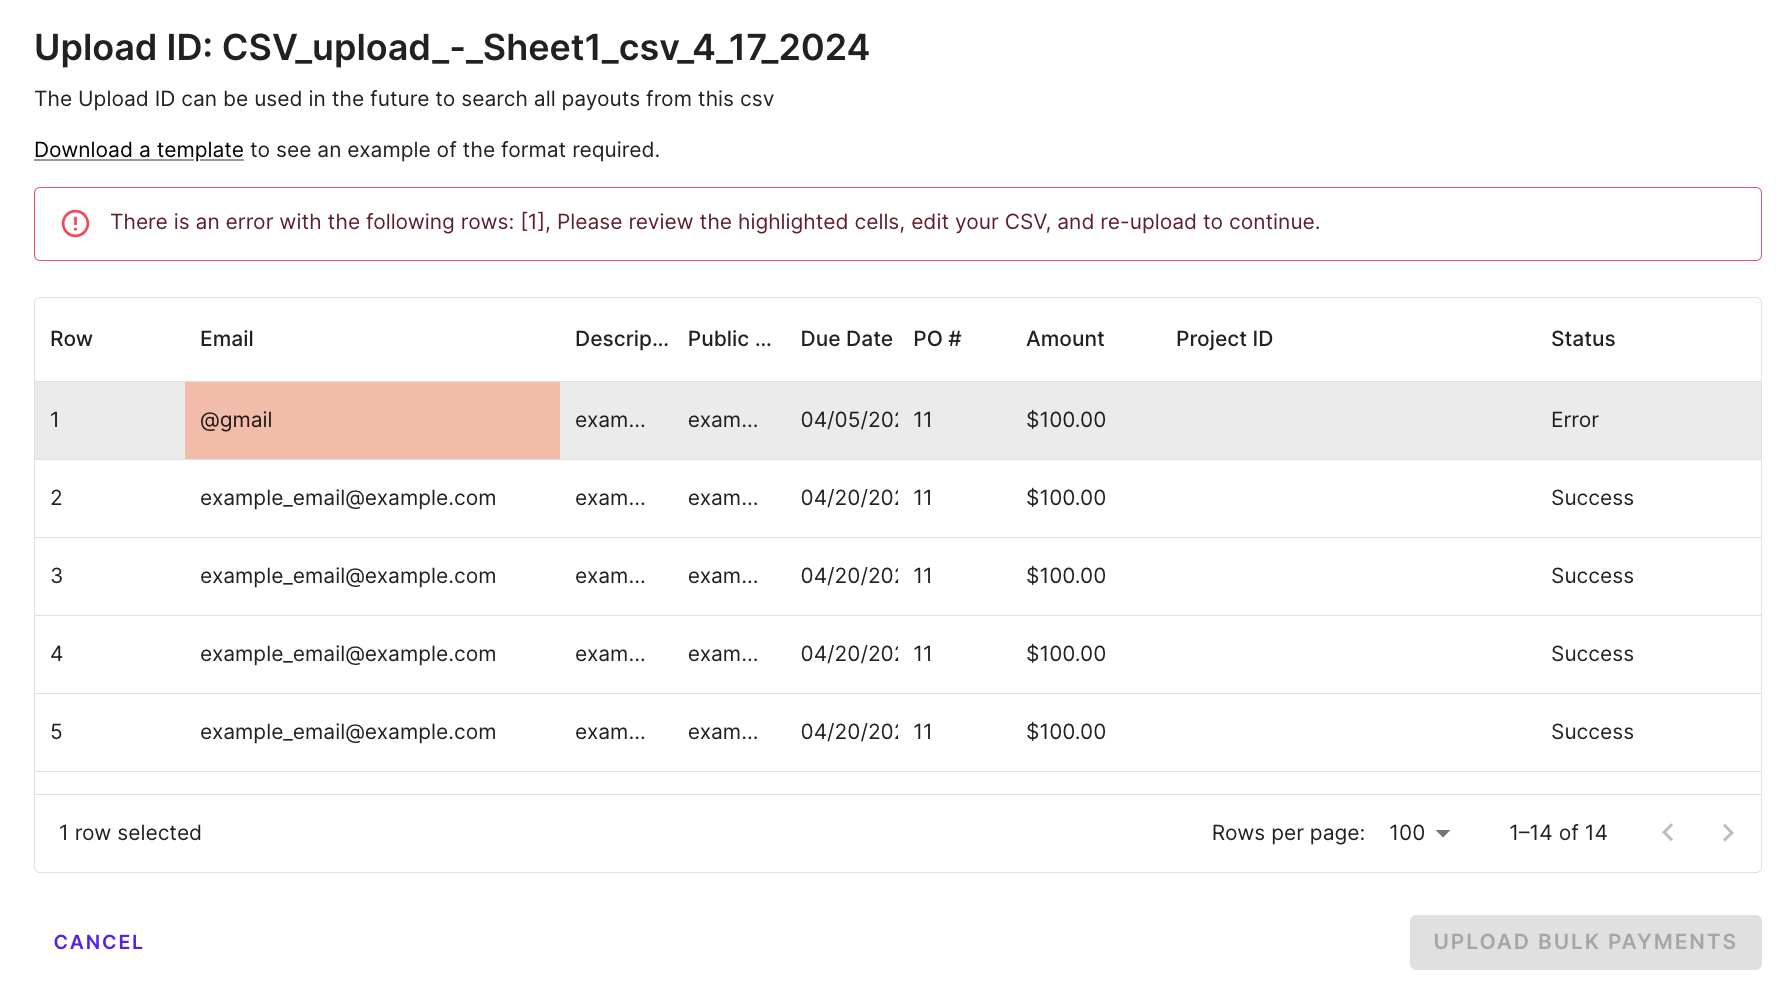
Bulk upload invoices via CSV to a Project
CSV Format Requirements
The Lumanu CSV upload requires the following column format/data in order to create a vendor invoice:
Lumanu ID | Description | Public notes | Due date | PO # | Amount (dollars) | Project ID |
|---|
Click the Upload CSV button.
Upload your formatted CSV file.
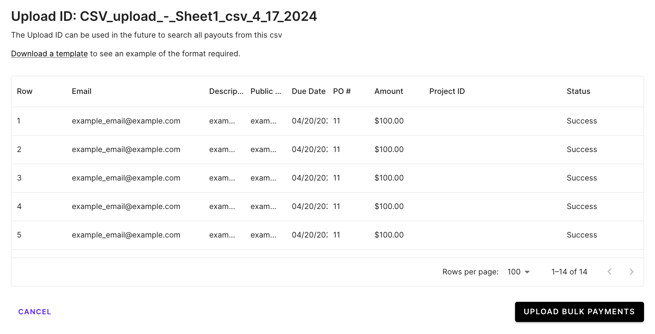
If there’s an error found in your upload, you will see a ‘Failure’ status indicated next to the line item with the error. Correct the error and re-upload the CSV.
If a large batch (>1000 payouts) is uploaded at once, the system may take a few minutes to complete the upload. Once the upload is complete, the user who uploaded the .csv will receive an email letting them know.
Your new invoices will appear under the Needs approval tab within your Project.