
What is the payout experience for the vendor?
Your vendors can create Lumanu accounts and request and/or receive invoices from your team in six simple steps (or less).
Vendors do not need to have a Lumanu account to be sent a payout.
Step 1: Create an account
There’s two different ways your vendors can create Lumanu accounts:
Via your team’s custom invite link, which you can find under your Vendors tab in the Lumanu app and copy to share with your vendors.
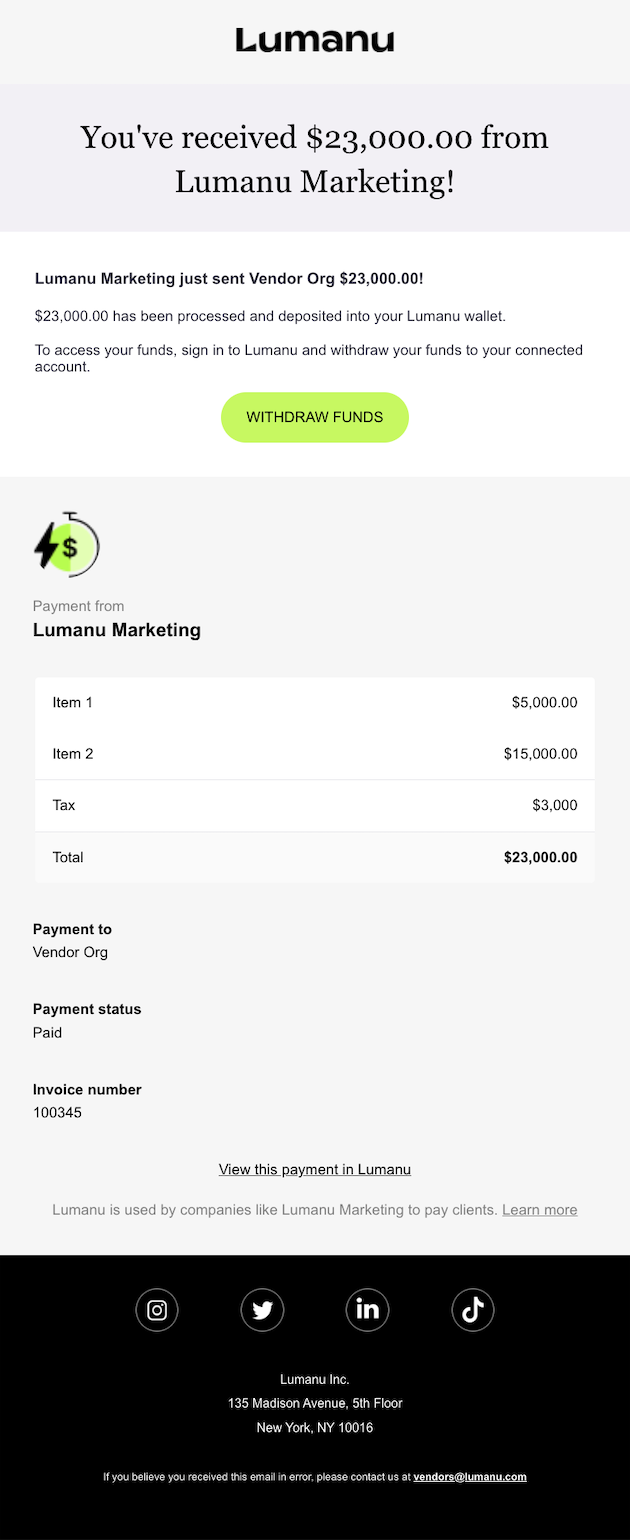
Directly from the You’ve been paid! email, which is sent once your team initiates a payout to the vendor's email address.
Step 2: Requesting an payout
Vendors can request a payment from your team under the Invoices tab by clicking the Create invoice button.
Vendors must be added to your Lumanu team as an approved Partner before they are able to Request Payments.

The Create Invoice window will populate for the creator to fill out. Approved brand partners will be selectable under the 'Who' dropdown to request payment from.
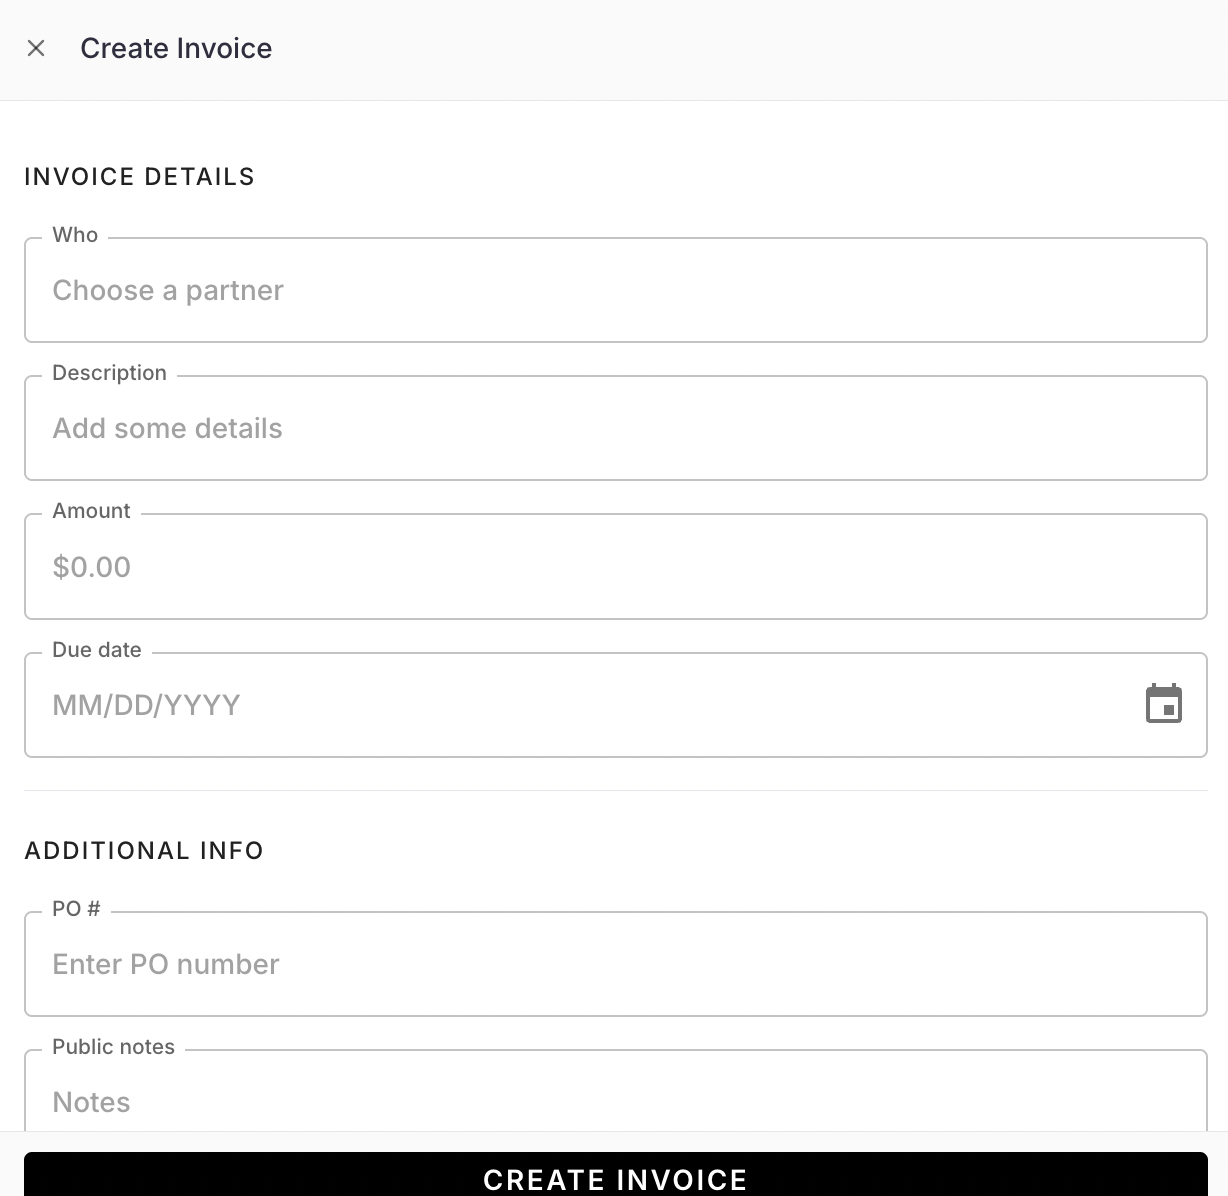
Once sent, a new payout will populate under your Needs approval tab.
Step 3: Receiving a payout
The vendor will receive an email notification regarding their invoice when your team:
Creates an invoice for them
Issues their payment
They will also be able to track incoming payments and past transactions by navigating under their Invoices tab.
Incoming payments show invoices that either the creator or company creates. Incoming payments will have one of the following statuses:
In review = Your team has not yet approved the payment
Approved = Your team has approved the payment, but has not yet issued payment for it
Paid = Your team has issued payment, and the funds appear in the vendor's Lumanu balance
Canceled = The invoice was canceled, either by your team or the creator themself
Transactions show money movement in the vendor's Lumanu balance, including received payments and withdrawals.
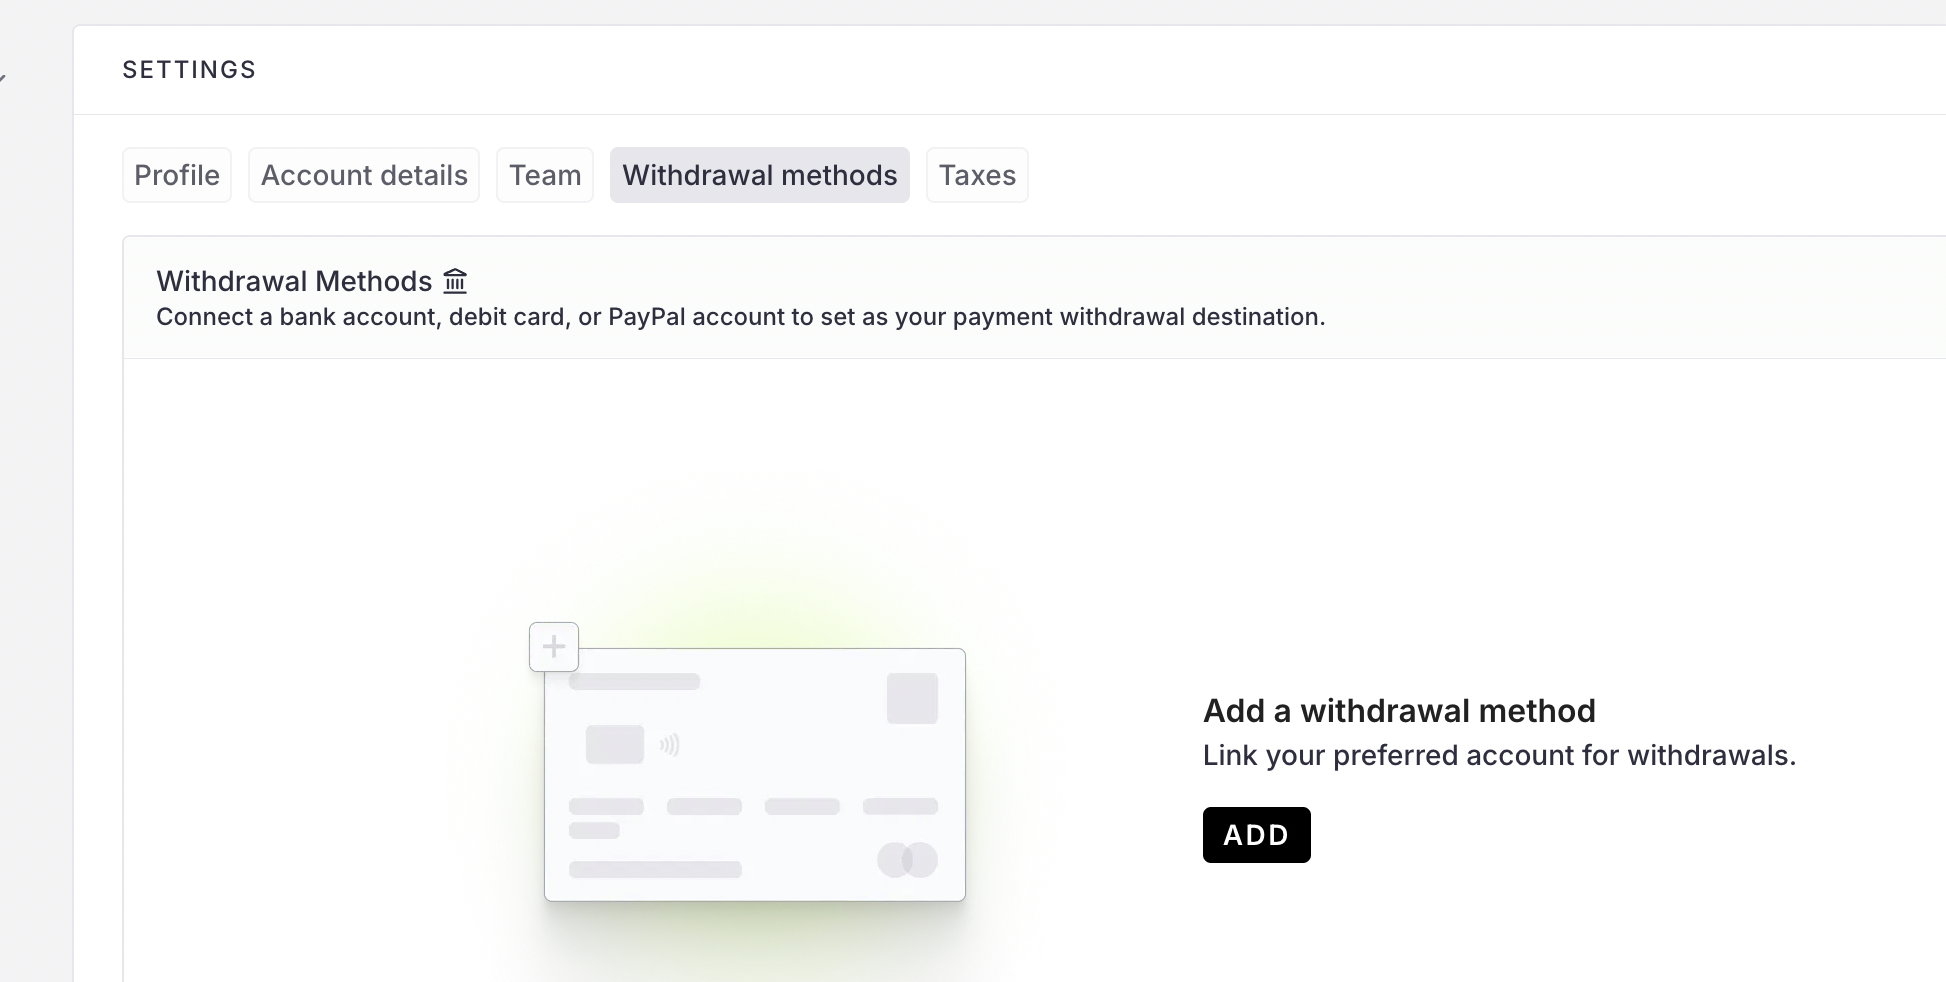
Step 4: Connecting a bank or PayPal account
Vendors can link their bank or PayPal account to Lumanu by navigating under Workspace Settings and clicking on the Withdrawal Methods tab. From there, they will click Add.
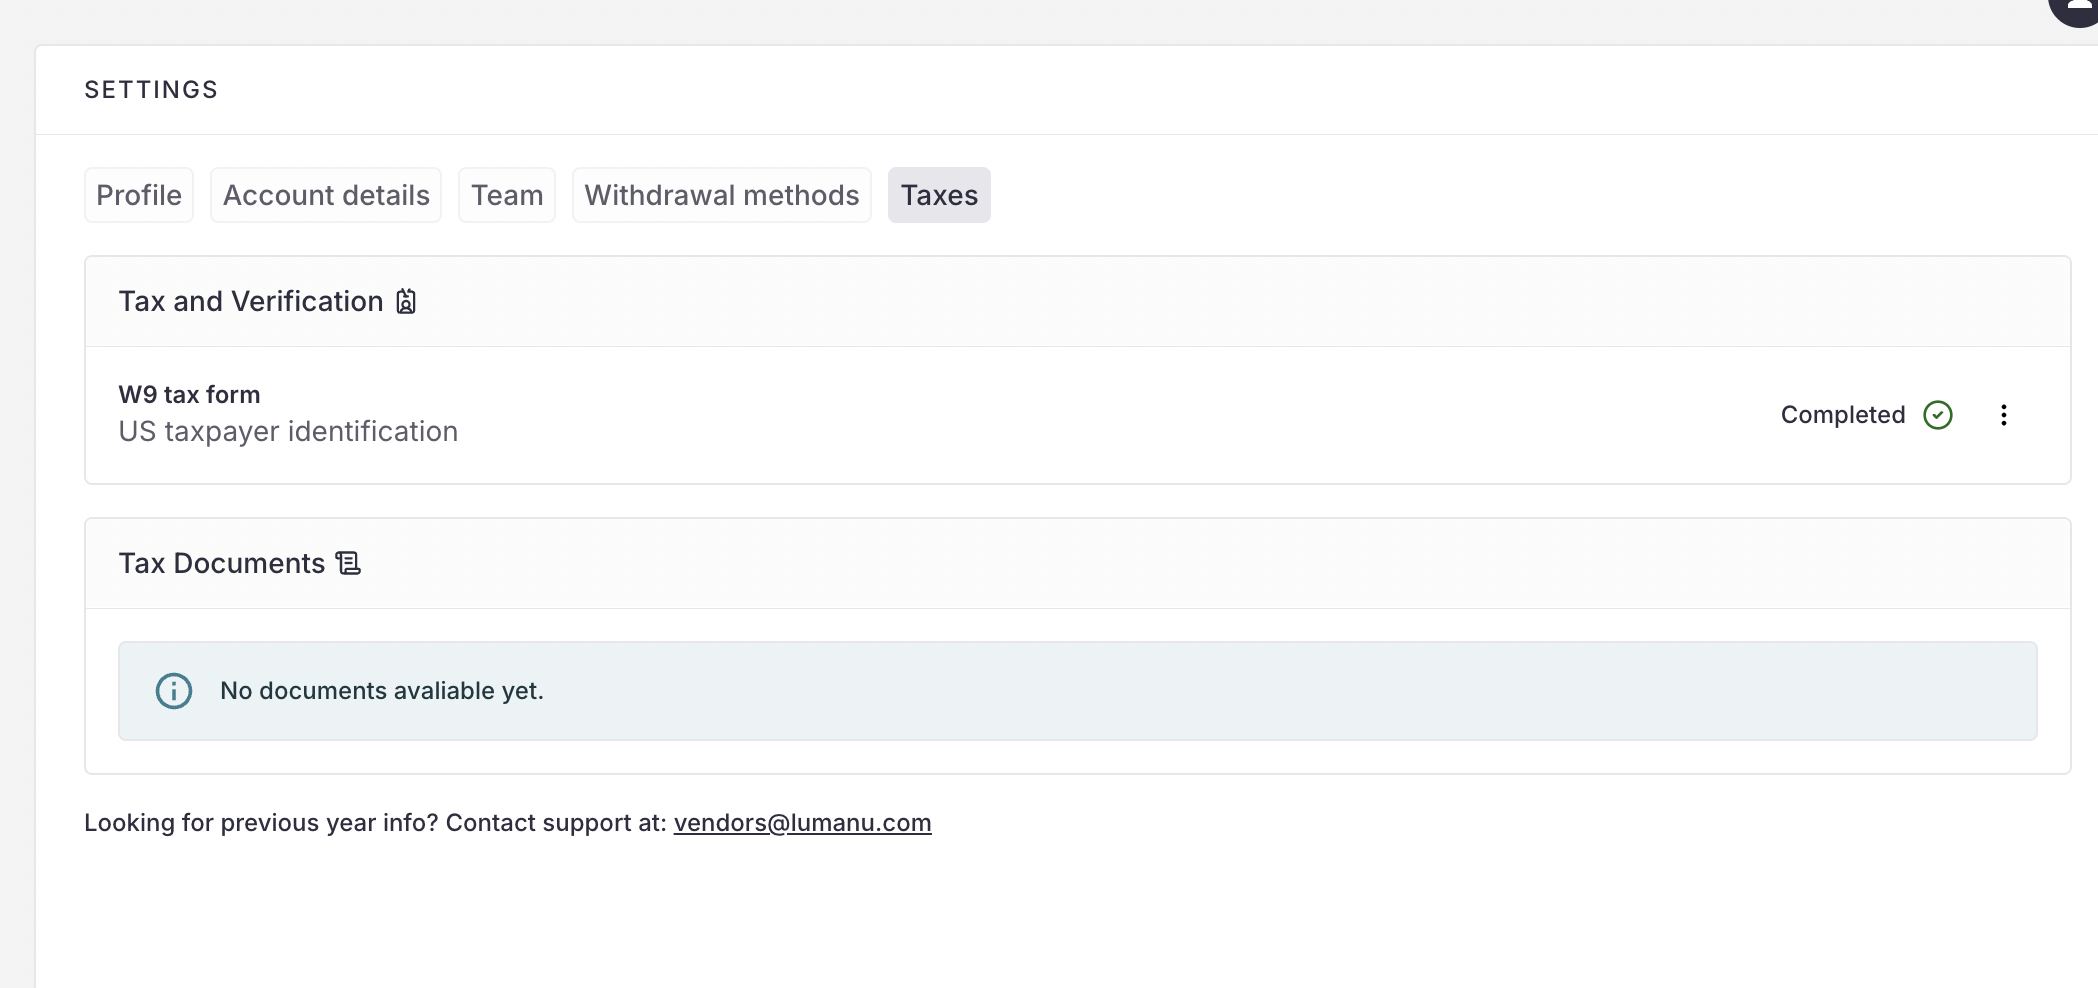
Step 5: Submitting tax information
Before withdrawing funds from their Lumanu wallet, vendors are required to submit their tax information annually to Lumanu. They can submit their tax information by navigating under Settings, then Taxes.
If they do not input their tax information before withdrawing their funds, they will be prompted to do so when attempting to withdraw. They need to provide this information once per calendar year.
Step 6: Withdrawing funds
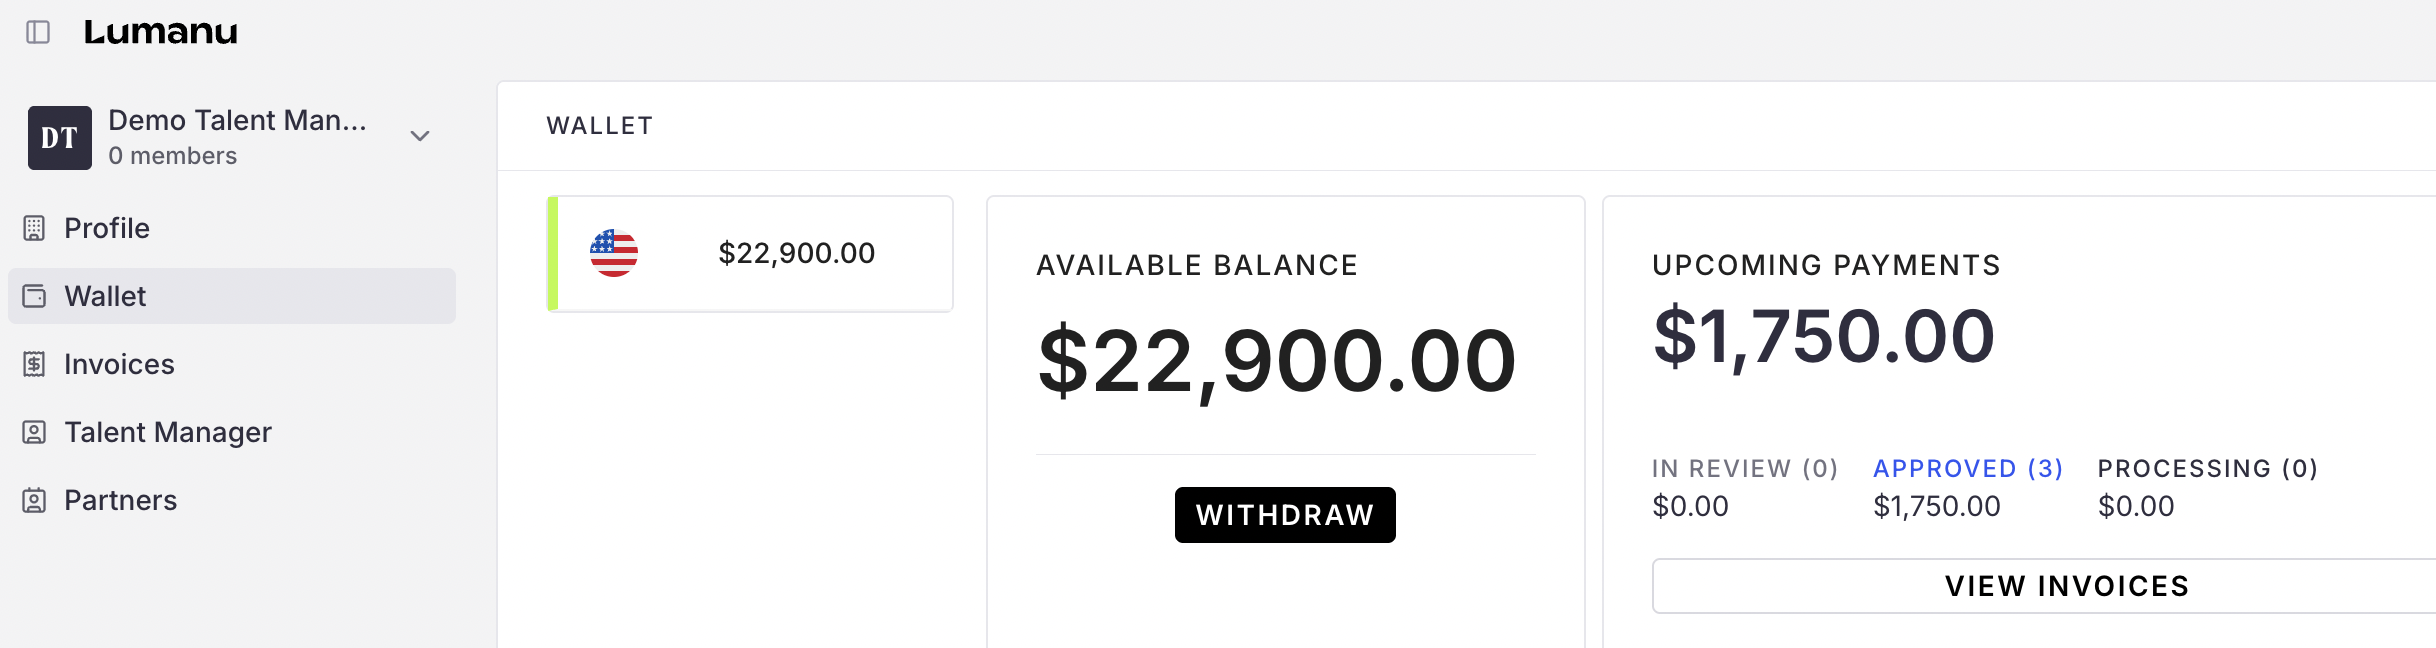
To withdraw funds, your vendors will navigate under their Wallet tab. From there, they will see their account balance and the Withdraw button.
After clicking Withdraw, the creator can expect to receive the funds in their connected bank account in 2-5 business days.