Approving invoices via the Lumanu dashboard
Approving invoices is a straightforward process within your Lumanu account. Follow the steps below to approve invoices and initiate payouts.
Step-by-Step Guide
1. Navigate to the Invoice
Log in to your Lumanu account.
Click on the Projects tab to access your list of projects.
Select the appropriate project to view the invoices within the project.
2. Select Invoices for Approval
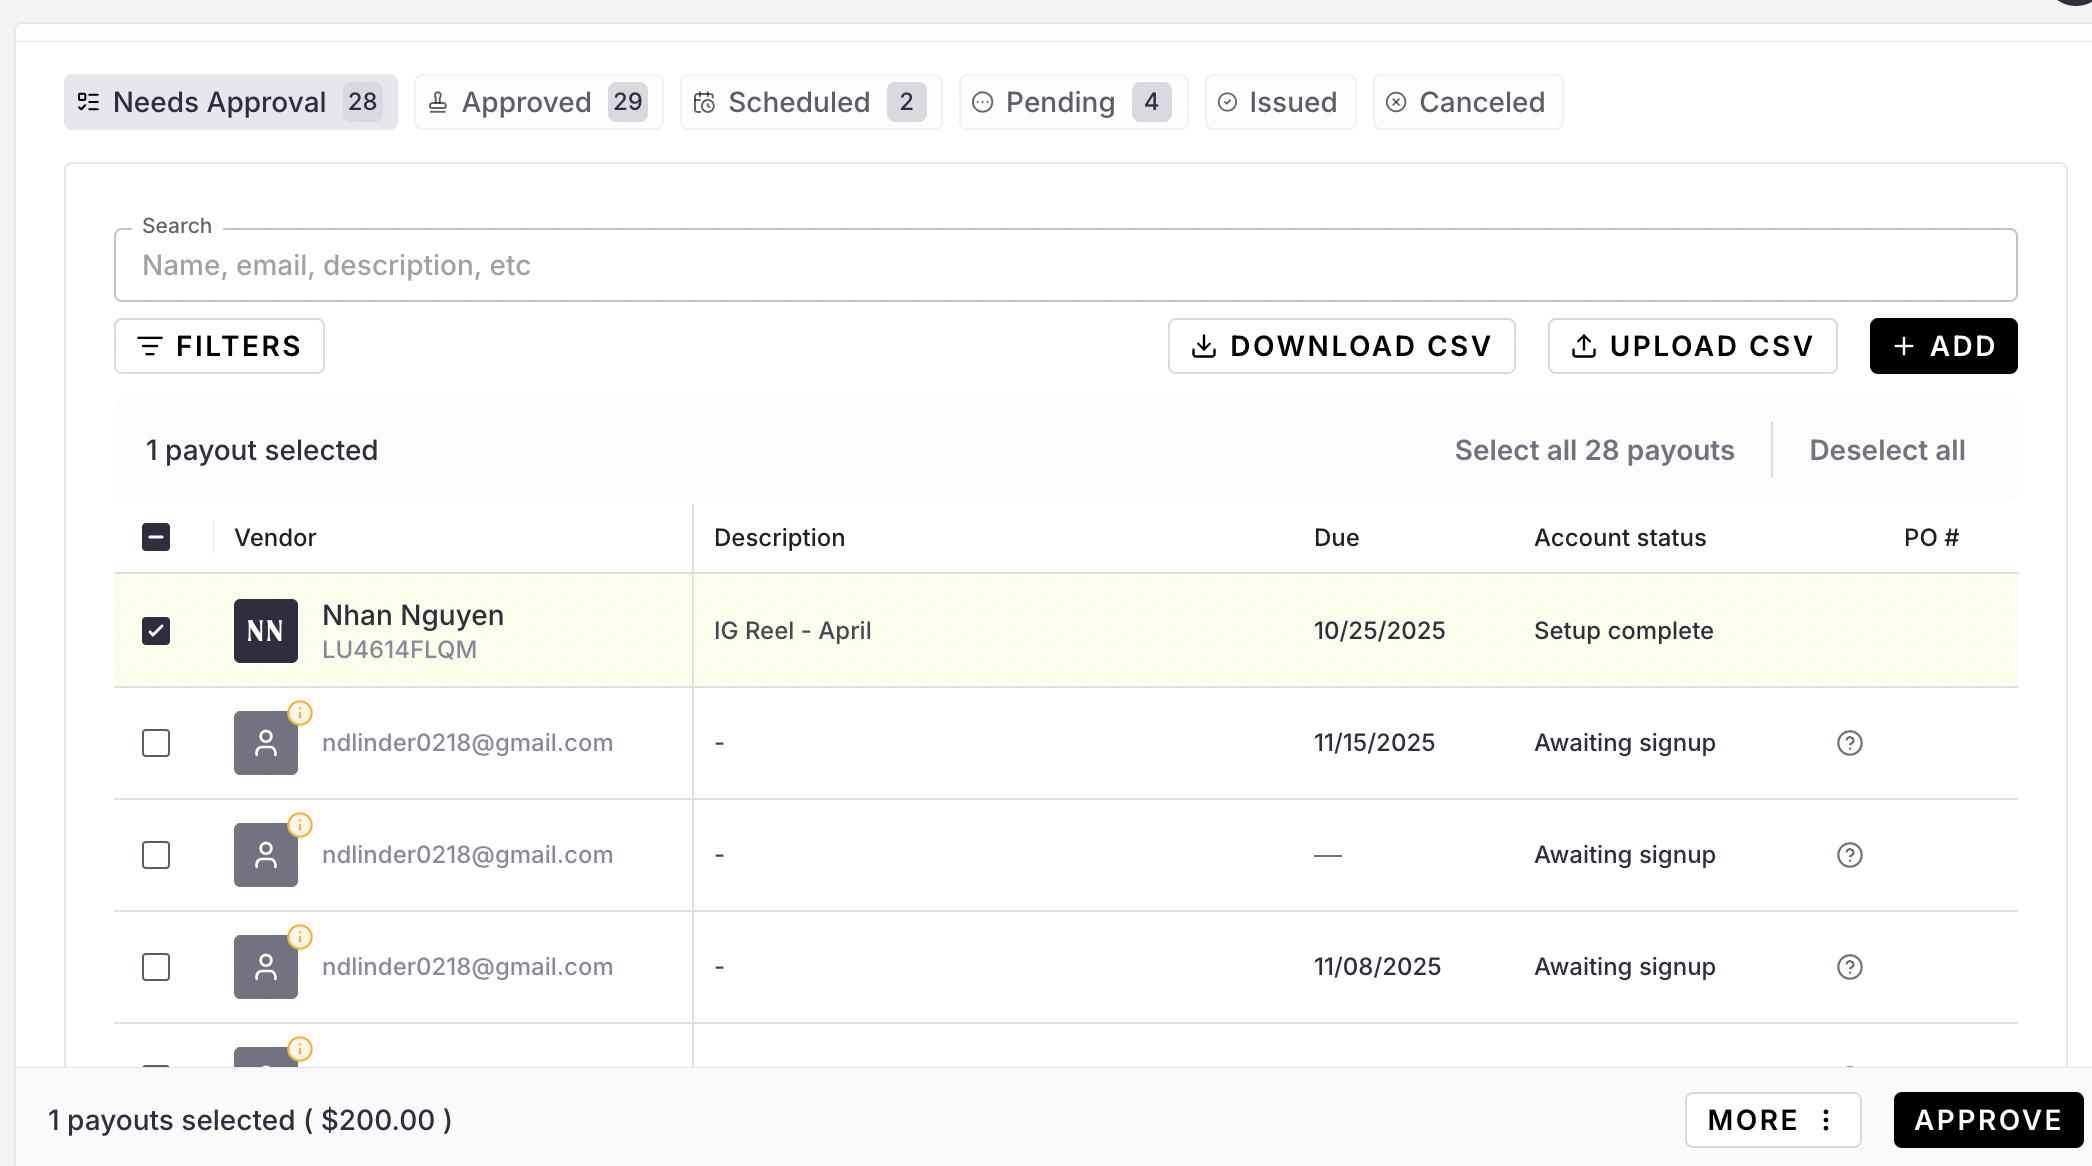
Navigate to the Needs Approval tab.
Browse through the list of invoices.
Check the boxes next to the invoice(s) you wish to approve.
3. Approve Selected Invoices
After selecting the desired invoices, click the Approve button.
A pop-up will appear displaying the list of selected invoices and the total approval amount.
4. Confirm Approval
Click the Approve button in the pop-up to finalize the approval.
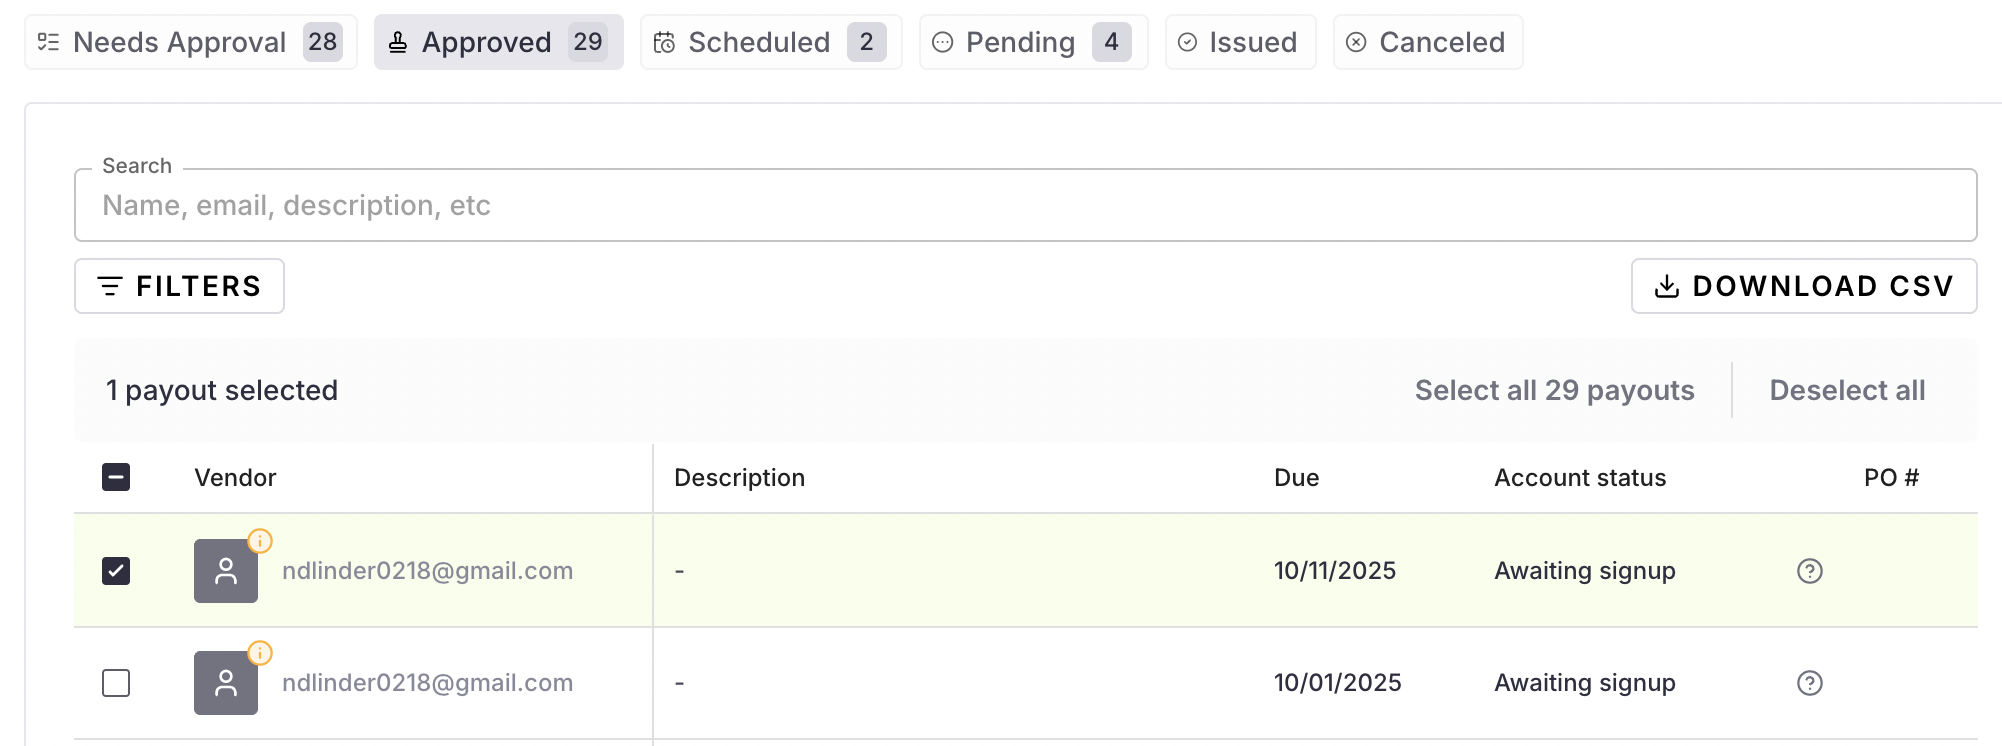
The approved invoices will now move to the Approved tab.
5. Process Payouts
Once the invoices are in the Approved tab:
A team member with the appropriate role can select the invoice(s) they are ready to process.
Check the boxes next to the invoice(s) you wish to pay.
Click on PAY X PAYOUTS ($XX.XX).
A pop-up will display the payout details, click continue and proceed to next step.
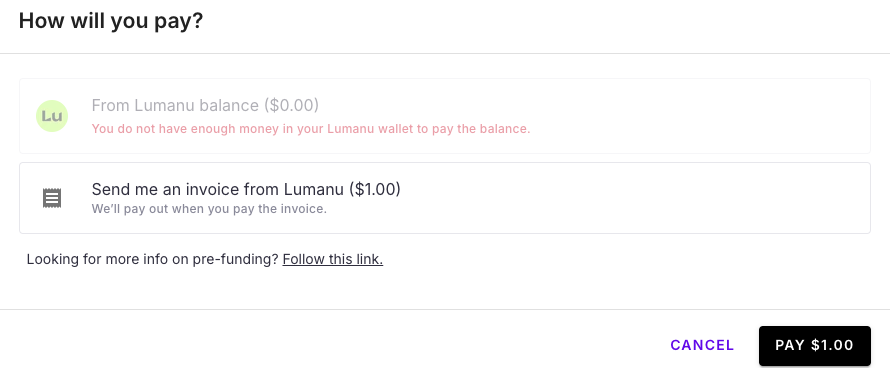
6. Choose Payment Method
Select Continue to proceed.
Decide how you would like to pay:
By following these steps, you can efficiently approve invoices and manage payments within your Lumanu account. If you have any questions or require further assistance, please reach out to support at support@lumanu.com.


